Understanding Washing Machine Structure
A washing machine has many parts inside. The drum, suspension springs, shock absorbers, and bearing seals work together to clean clothes. The water pump moves water in and out. All these parts must stay in place during transport. The internal wiring and hoses connect the machine’s systems. If these are damaged, the machine may not work.
Transit bolts are bolts that hold the drum tight. They stop the drum from moving while moving the machine. The user manual will explain how to use these bolts. Using them properly helps avoid damage from machine laying down or tilting. Always read the manufacturer guidelines before moving your washer.
For a deeper understanding of this mechanic, analyzing resources on how to move a washer and dryer safely provides excellent foundational context.
Can You Lay a Washing Machine on Its Side?
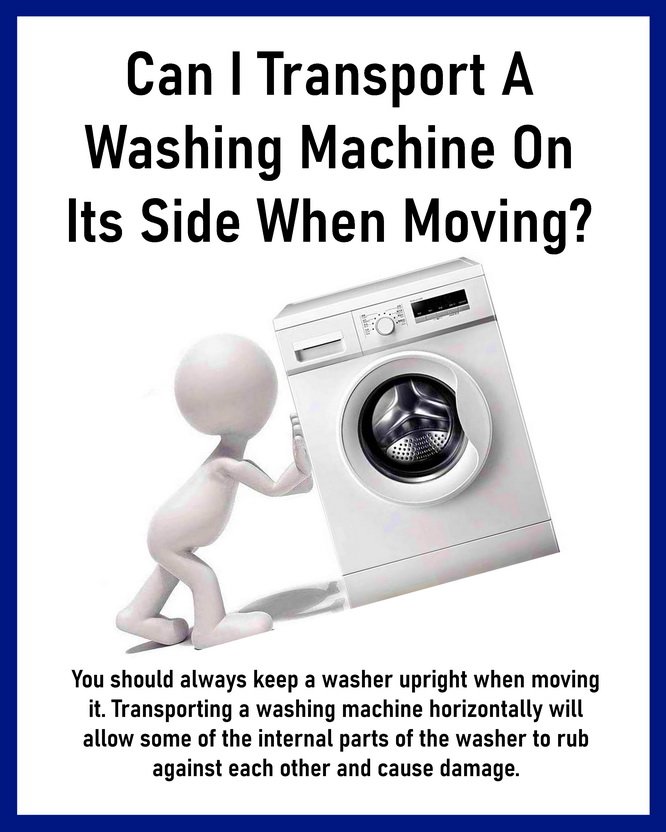
Industry consensus indicates that laying a washing machine on its side is risky. The washer drum orientation is designed for upright use. Laying it down can cause the drum to shift or bearings to fail. This leads to mechanical damage and water leakage. Shock damage to suspension springs and shock absorbers may also occur.
Many user manuals warn against laying washing machines flat. Damage from machine laying down often includes bent parts or broken seals. This can cause costly repairs. Repair technician visits after improper transport are common. The repair costs might even exceed the machine’s value.
Always check the washing machine shipping guidelines. Some models might allow a gentle tilt, but most advise upright transport. Transit bolts must be in place to reduce vibrations during transport. If unsure, hiring an appliance moving company can protect your machine.
Risks of Washing Machine Laydown
Laying a washing machine on its side can harm the drainage system and water pump. Water trapped in hoses and connectors may leak. Bearing seals can dry out or break if the machine is not upright. This causes water to enter parts where it should not be.
Machine vibrations during transport increase if the drum is not secured correctly. This can lead to internal wiring damage. The suspension springs might lose their tension. These risks reduce the machine’s lifespan and raise warranty issues.
Knowing these risks helps in planning the move. Proper packing instructions include securing hoses and wrapping the machine to avoid shocks. Transport orientation is key to preventing damage. You can avoid these problems by following appliance moving best practices.
Best Practices for Moving Washing Machines
To move a washing machine safely, always use transit bolts. These bolts must be reinstalled if removed for use. Secure hoses and connectors to avoid leaks. Drain all water before moving to protect the drainage system.
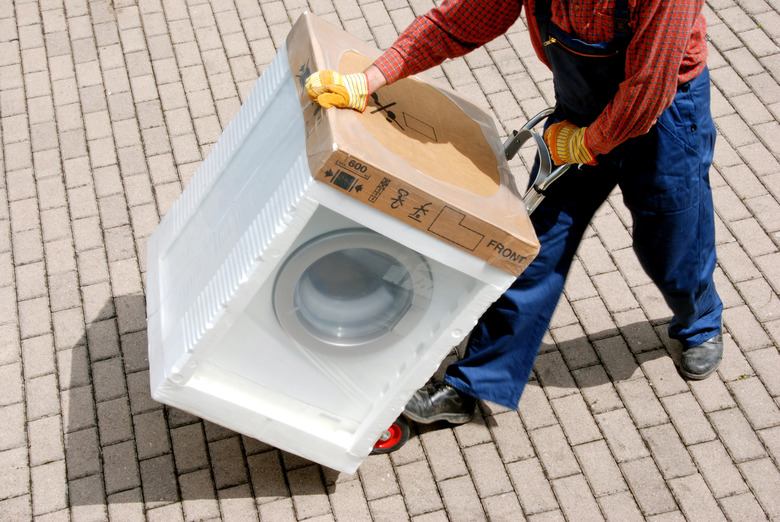
Use a dolly or appliance cart to keep the machine upright. Avoid tilting the unit more than 45 degrees. If space is limited, lay the machine on its side only as a last resort. Make sure the drum is locked with transit bolts and the side you lay it on is correct per the user manual.
🚀 Beginner Tip Box
Always label the front and back of the machine before moving. Keep track of all screws and bolts removed during disconnecting. This makes washing machine installation tips easier to follow later.
Washing Machine Installation Tips After Move
After transport, inspect the washing machine closely. Check hoses for cracks or leaks. Test the water pump and drainage system for proper flow. Run a short cycle without clothes to listen for unusual sounds.
Calibrate the machine if it has vibration sensors. Make sure the washer drum spins freely. Check suspension springs and shock absorbers for damage. Refer to the user manual for any reset or setup steps required after moving.
Proper maintenance after a move can prevent long-term damage. If you notice issues, contact a repair technician early. This may save on washing machine repair costs and avoid voiding warranty terms.
Transit Bolts and Warranty Importance
Transit bolts are vital for protecting the washing machine during transport. Removing them before use is critical. However, if you must move the machine again, reinstall them. Not using transit bolts during transport can cause internal damage.
Manufacturers usually state warranty terms clearly. Damage caused by improper transport, such as laying the machine down, may void the warranty. Always keep the original shipping instructions and user manual handy. This helps when claiming warranty or repair services.
Proper use of transit bolts also reduces machine vibrations during transport. This protects internal wiring and bearing seals. It lowers the chance of shock damage and water leakage.
Packing Instructions and Safe Transport
Packing a washing machine should follow clear steps. Drain all water and disconnect hoses. Secure hoses and connectors with clamps or tape. Wrap the machine in moving blankets to protect the exterior.
Use sturdy straps to hold the machine in place during transport. Avoid sudden jolts or drops. Keep the washing machine upright if possible. If you must lay it down, follow the user manual’s guidance on which side to choose.
✅ Checklist for Moving Washing Machines
- ✅ Drain all water fully
- ✅ Secure all hoses and connectors
- ✅ Use transit bolts to lock the drum
- ✅ Wrap machine in padding
- ✅ Keep machine upright or follow manual for side laying
- ✅ Use appliance moving equipment
Comparison of Transport Methods
Choosing how to transport your washing machine impacts its safety. The table below compares common methods and their risks.
| Transport Method | Risk Level | Damage Potential | Ease of Use |
|---|---|---|---|
| Upright with transit bolts | Low | Minimal | Moderate |
| Laying machine on side with bolts | Medium | Possible drum or seal damage | Easy |
| Laying machine on side without bolts | High | High risk of mechanical damage | Easy |
| Using appliance moving company | Lowest | Minimal | Most convenient |
Using an appliance moving company is best for avoiding damage. However, proper DIY methods can work well if done carefully.
Common Damage and Repair Costs
Improper transport can cause bearing seal leaks, broken suspension springs, or water pump failure. Repair technicians often find these issues after a move. Repair costs vary but can be expensive.
Replacing bearing seals or shock absorbers typically costs between $150 and $300. Water pump repair or replacement may add another $100 to $200. Damage caused by vibration or shock damage can increase costs further.
Preventing damage by following proper transport guidelines saves money. It also keeps your washing machine working longer and preserves warranty coverage.
Common Washing Machine Damages and Costs
| Damage Type | Cause | Repair Cost Range |
|---|---|---|
| Bearing Seal Leak | Improper laying/tilting | $150 – $250 |
| Suspension Spring Damage | Shock during transport | $100 – $200 |
| Water Pump Failure | Water leakage or shock | $100 – $200 |
| Internal Wiring Damage | Vibrations and shocks | $100 – $300 |
Tips for Washing Machine Maintenance After Move
Once moved, inspect the machine carefully. Check all connections including hoses and drainage system. Run a test cycle to detect any issues early. Clean filters and water inlet valves to ensure good flow.
Refer to trusted guides like how do I disconnect a washing machine for detailed steps on handling your appliance safely. This helps maintain the machine well after transport.
Regular maintenance after a move reduces the chance of faults. If vibration sensors detect problems, recalibrate or call a repair technician for help. Keeping your washing machine in good shape extends its life.
Washing Machine Maintenance Checklist After Moving
| Maintenance Task | Purpose |
|---|---|
| Inspect hoses and connectors | Prevent leaks |
| Check drainage system | Ensure proper water flow |
| Run test wash cycle | Detect mechanical issues |
| Clean filters and inlet valves | Maintain water supply |
| Calibrate vibration sensors | Reduce noise and shocks |
Following these steps will help avoid problems and keep your washer running smoothly after a move.
⭐ Expert Insight: Always follow the user manual and manufacturer guidelines when moving and setting up your washing machine. This protects your appliance and your warranty.
🆚 Comparison: When choosing between moving a washing machine yourself or hiring pros, consider the risks of damage and repair costs. Professionals usually provide safer handling but cost more.
Frequently Asked Questions
Is it safe to lay a washing machine on its side during transport?
Laying a washing machine on its side can cause damage to internal parts like the drum and bearing seals. It is generally not recommended unless the manufacturer’s guidelines allow it.
What are transit bolts and why are they important?
Transit bolts secure the washing machine’s drum during transport. Removing them before use is crucial, and keeping them in place while moving helps prevent mechanical damage.
Can laying down a washing machine affect its warranty?
Yes, ignoring shipping instructions and laying the machine down can void warranty terms if damage occurs. Always check the user manual for warranty conditions.
How should I move a washing machine safely?
Use transit bolts, keep the washing machine upright if possible, secure hoses and connectors, and use an appliance moving company if needed for best results.
What maintenance should be done after moving a washing machine?
Check hoses and connectors for leaks, inspect the drainage system, test vibration sensors, and calibrate the machine according to the user manual to ensure proper function.

Michael Peterson is a home appliance writer focused on practical washing machine care, maintenance, and troubleshooting. He shares simple, reliable tips to help readers keep their washing machines running efficiently, avoid common problems, and extend appliance life.