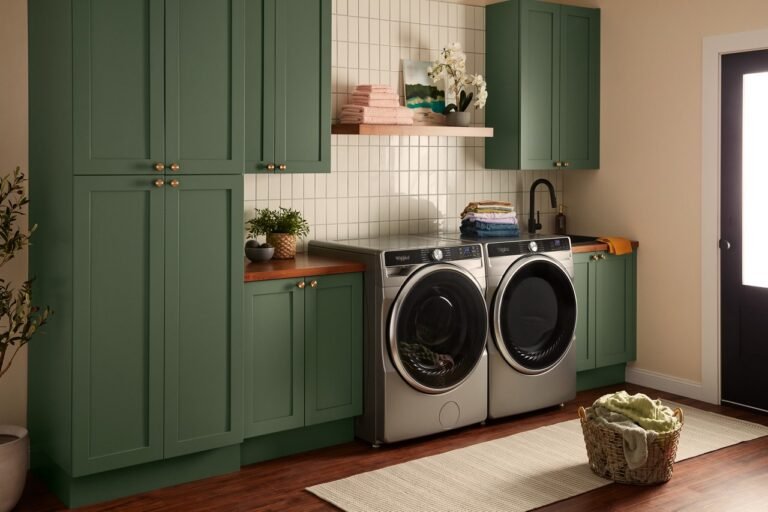
Introduction to Maytag Agitator Removal
Removing the agitator from a Maytag washing machine is a common task for repairs and maintenance. The agitator helps move clothes during wash cycles. Knowing how to take off the agitator Maytag models use is key for DIY repairs. This guide explains the steps and tools needed for agitator removal and replacement.
Understanding the agitator’s role in your washer is important. It connects to the drive shaft and helps clean clothes by moving them in the tub. If the agitator is broken or noisy, removal and repair may be needed. For a deeper understanding of this mechanic, analyzing resources on agitator removal in Maytag washers provides excellent foundational context.
Also, exploring how to wash towels properly can reduce wear on your agitator and washer. You can find tips in our article on how machine wash towels. This offers laundry care advice that complements agitator maintenance.
Tools Needed for Removing the Agitator
To remove the agitator on a Maytag top load washer, gather these tools:
- ✅ Socket wrench set (usually 9/16 inch socket fits agitator bolt)
- ✅ Phillips screwdriver (screwdriver size #2 for agitator screws)
- ✅ Agitator removal tool (may help if agitator is stuck)
- ✅ Flashlight (to see agitator bolt location clearly)
Having the right tools makes the job easier and safer. The agitator bolt is usually hidden under the agitator cap. Removing the cap with a screwdriver reveals the bolt.
Using a socket wrench, turn the agitator bolt counterclockwise to loosen it. For stuck agitators, the removal tool helps pry it off without damage. Avoid using excessive force to prevent breaking the washer tub.
Step-by-Step Agitator Disassembly Guide
Follow these steps for DIY agitator removal on your Maytag washer:
- Unplug the washer for safety.
- Lift off the fabric softener dispenser or agitator cap using a flat screwdriver.
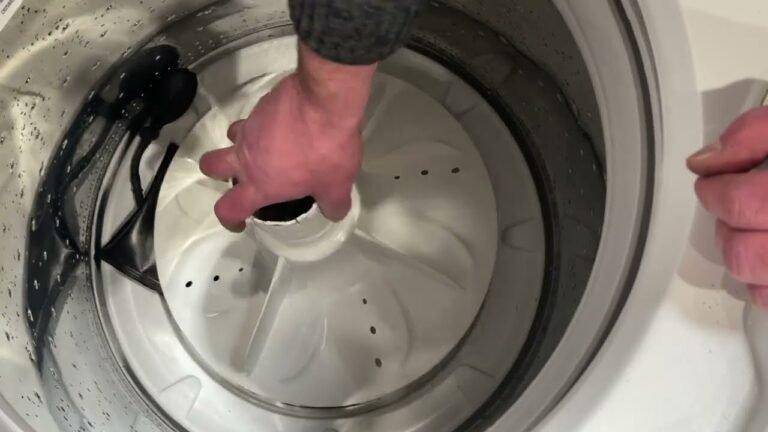
- Locate the agitator bolt in the center of the agitator base.
- Use the socket wrench to remove the agitator bolt.
- Carefully pull the agitator upward to remove it from the drive shaft.
- If stuck, use the agitator removal tool or gently rock it side to side.
Once removed, inspect the agitator parts such as agitator dogs and gears for wear. Clean any buildup on the agitator base with a cloth and mild detergent.
Reinstalling the agitator involves reversing these steps. Ensure the bolt is tight but do not overtighten. This can damage the clutch mechanism.
Maytag Model Agitator Parts Overview
The agitator assembly includes several parts:
- Agitator Cap – covers the bolt and protects internal parts.
- Agitator Dogs – small plastic parts that control the agitator’s movement direction.
- Agitator Bolt – secures the agitator to the drive shaft.
- Agitator Base – the main body that agitates clothes.
- Clutch Mechanism – allows the agitator to move properly with the drive shaft.
Understanding these parts helps during repair or replacement. Worn agitator dogs often cause noise or poor agitation. Replacing them can fix many problems at a low cost.
Below is a table showing common agitator parts and typical costs for replacement.
| Part | Function | Average Cost (USD) |
|---|---|---|
| Agitator Cap | Covers bolt, protects parts | $5 – $15 |
| Agitator Dogs | Controls movement direction | $10 – $20 |
| Agitator Bolt | Secures agitator to shaft | $3 – $10 |
| Agitator Base | Main agitator body | $30 – $70 |
| Clutch Mechanism | Allows proper agitator motion | $25 – $50 |
Repair cost estimates vary by model and part quality. For an exact quote, check your Maytag washer model number and consult authorized dealers or repair manuals.
Maytag Washing Machine Maintenance Tips
Regular maintenance extends your washer’s life. Clean the agitator components every 6 months. Use a soft brush and mild detergent to remove lint and detergent buildup.
:max_bytes(150000):strip_icc()/how-to-remove-agitator-from-washing-machine-5211908-hero-1d1327a42ed94962af915e32891c5ab1.jpg "How to Remove the Agitator From a Washing Machine (Figure)")
Also, check agitator dogs and bolts for wear or looseness. Tighten bolts with the correct screwdriver size or socket wrench. Replace worn parts promptly to avoid more damage.
For washing machine upkeep, learning how to remove smell washing machine can improve your laundry results and protect your washer’s internal parts. Clean washers work better and last longer.
Troubleshooting Common Agitator Problems
Agitator problems often show as noise or poor cleaning. Worn agitator dogs cause clicking or grinding sounds. Loose agitator bolts let the agitator wobble during cycles.
If your Maytag washer agitator is noisy, check the agitator bolt location and tightness. Replace worn dogs or gears as needed. Sometimes, the agitator coupling wears out and needs replacement.
Below is a comparison table for symptoms and causes of agitator issues.
| Symptom | Possible Cause | Suggested Fix |
|---|---|---|
| Noise during agitation | Worn agitator dogs | Replace agitator dogs |
| Agitator not moving | Loose or broken bolt | Tighten or replace bolt |
| Agitator wobbling | Loose bolt or clutch | Tighten bolt, check clutch |
| Clothes not cleaned well | Damaged agitator gears | Replace agitator gears |
For complex repairs, consult your Maytag repair manual or professional service. Some parts require precise installation to avoid damage.
Reinstalling the Agitator: Best Practices
After cleaning or repair, reinstall the agitator carefully. Follow these steps:
- Align the agitator base onto the drive shaft.
- Insert and tighten the agitator bolt with the socket wrench.
- Replace the agitator cap by pressing it firmly in place.
- Test the agitator by running a short cycle without clothes.
Ensure the bolt is snug but not overtightened. Over-tightening can damage the clutch mechanism or strip threads.
If you need guidance on Maytag washer operation, check our detailed guide on how to work a Maytag washing machine to optimize your washer use and care.
Conclusion
Removing the agitator from a Maytag washing machine is a manageable task with the right tools and knowledge. Proper DIY agitator removal lets you clean, repair, or replace worn parts, saving money on repairs.
Always follow safety steps like unplugging the washer and using the correct screwdriver size for screws. Maintain your agitator by regular cleaning and inspection to prevent problems.
When in doubt, consult your washer’s user manual or professional help. Keeping the agitator in good condition ensures your Maytag washer runs smoothly and cleans clothes well for years.
For more on washing machine upkeep, learn about how to clean inside agitator in washing machine. This helps keep all parts fresh and working.
Frequently Asked Questions
What tools do I need to remove the agitator from a Maytag washer?
You will need a socket wrench, a screwdriver (usually a Phillips #2), and sometimes an agitator removal tool.
Where is the agitator bolt located in a Maytag washing machine?
The agitator bolt is located under the agitator cap at the center of the agitator base.
Can I replace the agitator myself on a Maytag washer?
Yes, with the right tools and following the model-specific repair manual, you can replace the agitator safely.
Why is my Maytag washer agitator making noise?
Noise can result from worn agitator dogs, loose agitator bolt, or damaged agitator gears.
How often should I clean the agitator components?
Cleaning the agitator every 6 months helps prevent buildup and keeps the washer working well.

Michael Peterson is a home appliance writer focused on practical washing machine care, maintenance, and troubleshooting. He shares simple, reliable tips to help readers keep their washing machines running efficiently, avoid common problems, and extend appliance life.